My Garage
My Account
Cart
This part fits
2010 Infiniti G37 Convertible (VIN: JN1CV6FE3AM354094) Convertible; 6 Cyl 3.7L; Rear-Wheel Drive; Premium; 7-Speed Automatic Transmission
Check another vehicle- Fitting Vehicle Options: VQ37VHR
Infiniti E6210-JJ52A Rear Shock Absorber Kit
2009-2015 Infiniti E6210JJ52A
Customer Questions & Expert Answers (2)
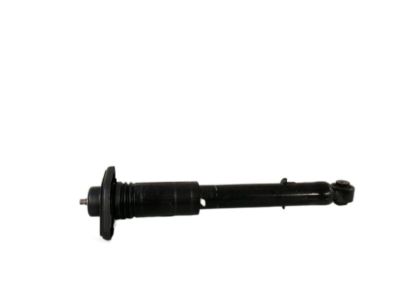
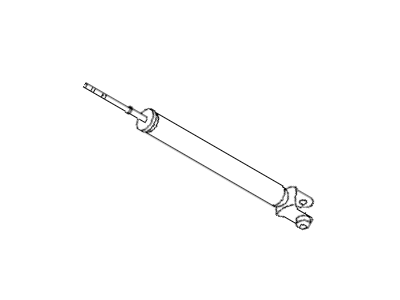
- Part DescriptionShock Absorber Kit-Rear
- Lookup Code56210K
- PositionRear
- ManufacturerInfiniti
- Require Quantity02
- Package Quantity1
This part fits
2010 Infiniti G37 Convertible (VIN: JN1CV6FE3AM354094) Convertible; 6 Cyl 3.7L; Rear-Wheel Drive; Premium; 7-Speed Automatic Transmission
Check another vehicle- Fitting Vehicle Options: VQ37VHR
$283.31 MSRP: $385.45
You Save: $102.14 (27%)
Ships in 1-3 Business Days
1
- Related Parts
- Specifications
- Q&A
Product Specifications
Brand Genuine Infiniti Lookup Code 56210K Manufacturer Part Number E6210-JJ52A Part Description Shock Absorber Kit-Rear Other Names Shock, Shock Absorber Item Dimensions 21.6 x 3.1 x 2.1 inches Item Weight 2.30 Pounds Position Rear Condition New Fitment Type Direct Replacement Require Quantity 2 Manufacturer Infiniti SKU E6210-JJ52A Warranty This genuine Infiniti part is guaranteed by Infiniti's factory warranty. Shipping & Return Shipping Policy Return Policy Warning: California's Proposition 65Customer Questions & Expert Answers
- Q:Does this part fit the vin i entered ? Posted by InfinitiPartsDeal Specialist
- A:You can Select Your Vehicle to check if E6210-JJ52A fits your vehicle.Posted by InfinitiPartsDeal Specialist
- Installation and Repair Tips by AI Expert
- Removal: 1. Park on level ground, chock wheels, engage parking brake and wear eye protection and gloves. 2. Disconnect the negative battery terminal and wait several minutes for systems to power down; if the vehicle has electronic suspension, follow its shutdown guidance. 3. Raise and securely support the vehicle on jack stands and remove the wheel to access the shock area. 4. Support the suspension/axle with a jack or stand to remove load from the shock before loosening fasteners. 5. Remove any splash shields, brackets, or components that block access to the shock mounting points. 6. If the shock is part of a coil-spring strut, either remove the entire strut assembly or securely compress the spring with a proper spring compressor before separating components; releasing a compressed spring is dangerous. 7. Disconnect any electrical connectors, sensors, or wiring attached to the shock and tag them for correct reinstallation. 8. Loosen and remove the lower fastener(s) that attach the shock to the control arm/axle, taking care to support the shock so it does not fall. 9. Loosen and remove the upper fastener(s) at the mount in the body or tower and lift the shock out of the vehicle. 10. Inspect mounting hardware, bushings, mounts and surrounding suspension parts for wear or damage and note any items to replace. Installation: 1. Compare the new shock to the removed unit to confirm orientation and that required hardware is present. 2. If installing a strut with a coil spring, assemble it using a proper spring compressor or install a complete replacement assembly per its design. 3. Position the shock in place and loosely install the upper fastener(s) to hold it. 4. Install the lower fastener(s) and snug all mounting hardware; final tightening is typically done with the vehicle at normal ride height. 5. Reconnect any electrical connectors or sensor wiring and route harnesses clear of moving parts. 6. Reinstall any splash shields, brackets, sway bar links or other components removed for access. 7. Reinstall the wheel, lower the vehicle to the ground, and set it at normal ride height before final tightening. 8. Tighten all shock fasteners to the manufacturer's specifications (consult a service manual or spec chart) and reattach the negative battery terminal. 9. Cycle the suspension by pushing down on the vehicle several times, check for leaks and proper component seating, and clear any stored codes if necessary. 10. Perform a cautious road test listening for noises and confirming ride quality; re-inspect fasteners and check for leaks after a short drive. Repair tip: Replace mounting bushings, studs/nuts and any rusted hardware when installing new shocks and arrange a wheel alignment if ride height or camber/caster was disturbed during the job.
- Q:
Why choose Infiniti Parts Deal
- Dedicated Service
Your complete satisfaction is our #1 goal
- Lowest Prices
Best deals on genuine OE parts from dealerships
- Fast Delivery
Orders are processed and delivered promptly